As one of the new characters introduced in Street Fighter 6, this JP character guide is designed to help you learn how to play JP. We’ll teach you JP’s combos, anti-air attacks, and a few solid strategies to help you along the road to victory online and in tournaments. This guide covers JP at the launch of Street Fighter 6, but we’ll do our best to keep it updated as the game is patched and JP strategies evolve.
JP Character Overview
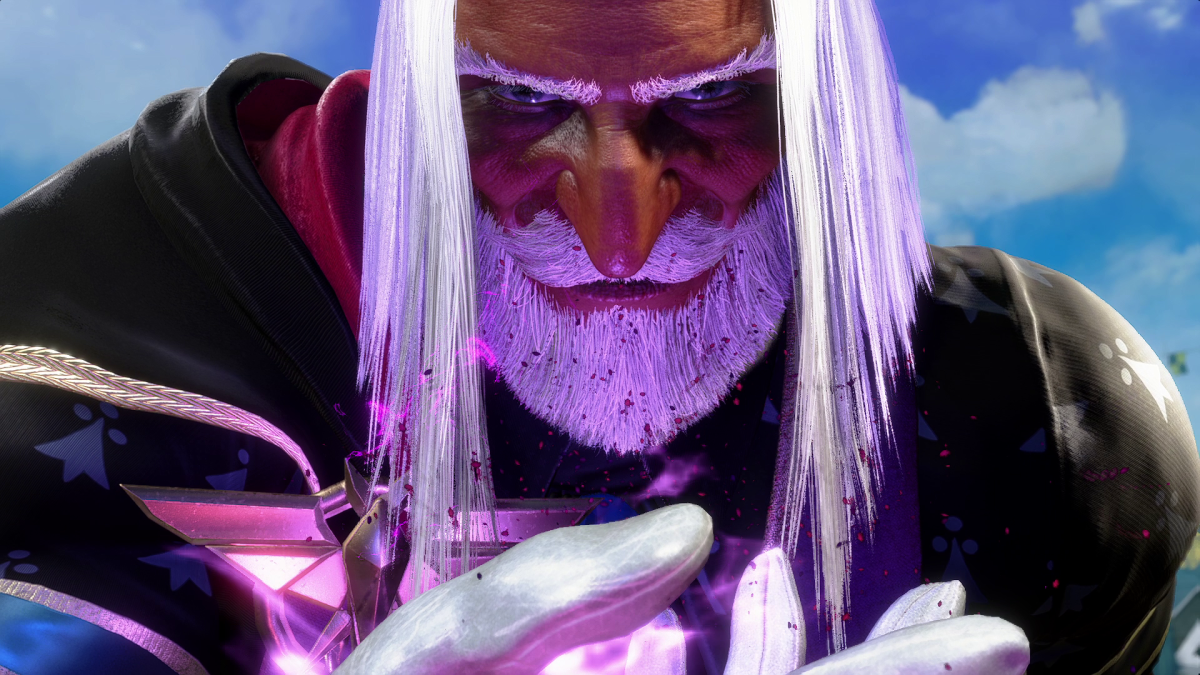
When Capcom first showed off JP, he was easily one of the best designed characters in the game, with a ton of swagger. His gameplay appeared to be that of a dedicated zoner, that would keep opponents on the far side of the screen in a bullet-hell-style environment. Thoughts of Morrigan from Ultimate Marvel vs. Capcom 3 immediately came to mind.
After playing the character for the last two weeks, I’ve come to another conclusion. While JP’s main focus is definitely zoning opponents from across the screen, my guess is that one of the testers at Capcom was too good with JP early in the development of the character. Capcom tried to make sure many of his best attacks were well-balanced, but they may have gone a bit too far. JP does have a number of tricks up his sleeves, but specific gameplay choices drastically limit just how potentially scandalous this character could have been.
He’s very weak once an opponent is within jumping distance, or has a full-screen projectile counter at the ready (level three super, teleport, etc.). Your primary goal is to keep the opponent on the far side of the screen for as long as possible. If they close the gap, then your objective shifts to looking for an opening that you can use to combo into a number of JP’s attacks that will knock the opponent back over to the far side of the screen.
Notations
U = Up
D = Down
F = Forward
B = Back
cr = Crouching
st = Standing
P = Punch
LP = Light Punch
MP = Medium Punch
HP = Heavy Punch
K = Kick
LK = Light Kick
MK = Medium Kick
HK = Heavy Kick
QCF = Quarter Circle Forward (fireball motion)
QCB = Quarter Circle Back (reverse fireball motion)
JP Basic Info
Pros
- Anti-airs that can lead to big damage
- Moderate zoning pressure from across the screen
- A level three super that covers the entire length of the screen
Cons
- Has very limited options at close range
- JP’s best poke can’t be special canceled
- Reversal options are limited
- Slow walk speed
- Below average dash
- The projectile throw is easily reactable, even at close range
- The projectile throw cannot be used while a Departure portal is open
Best Normals
- st.MP
- st.HP
- cr. LP
- st. LP
Best Anti-Air Attacks
- cr.HP
- F+HK
Sample Combos
- cr.LP > cr.LP > Stribog (QCF+LP)
- cr.LP > st.LP > Stribog (QCF+LP)
- cr.LK > cr.LP > Stribog (QCF+LP)
- st.HK > st.HP > Stribog (QCF+LP)
- st.HK > st.HP > Lovushka (QCBx2+P) > st.HK > st.HP > Departure (QCB+HP) > st.HK > st.HP > Stribog (QCF+LP) > st.HP > Triglav (DD+LP)
- st.HK > st.HP > Lovushka (QCBx2+P) > st.HK > st.HP > Departure (QCB+HP) > st.HK > st.HP > Stribog (QCF+PP) > Chornobog (QCFx2+P)
JP General Strategies
JP is at his best when the opponent is on the far side of the screen. From this position he can alternate between the Triglav (DD+P) ground thorn, and Torbalan (QCF+K) projectile attacks. If the opponent parries these attacks, JP can offer a mix-up with the Embrace (QCB+K) projectile throw.
Unfortunately, the projectile throw is slow and easily reactable by even moderately skilled players, but it can still catch people off guard from time to time. In most situations it’s safe to attempt the throw when the opponent is on the far side of the screen. The projectile throw has considerable recovery, meaning JP is a sitting duck if the opponent jumps over the throw, or has an attack with projectile invincibility.
If the opponent is within jumping distance, JP’s options become drastically limited. While it’s possible to catch a novice player with a random projectile, most moderately skilled players will jump over it on reaction, and punish JP severely. The character is designed to use his standing and crouching light attacks, canceled into the light Stribog special in order to knock an opponent back out to full-screen range. Unfortunately, his light attacks have limited range, so you need to be careful with how and when you use them.
JP’s best normals are his standing heavy punch (HP) and standing medium punch (MP). The standing MP has good range, but can’t be special canceled. Use it as a keep-out tool, or for whiff punishment at maximum range. The standing HP is a bit slow, but can be easily hit confirmed into the Stribog (QCF+P) special to knock the opponent back across the screen, or even into the light Torbalan projectile. Be cautious of Drive Impact, as many of JP’s better normals and command normals can be easily countered with a well-timed Drive Impact.
A typical sequence with JP may look something like this:
- cr.LP > cr.LP > Stribog (QCF+LP)
- Triglav (DD+HP)
- Torbalan (QCF+K)
- Triglav (DD+HP)
If the Torbalan or Triglav hit, you usually have time to go for a Departure (QCB+P) portal setup. The OD version (QCB+MP+HP) is recommended to place two portals on screen and recover as quickly as possible. You can then go for an immediate Torbalan (QCF+K), then quickly use a Window Warp (QCB+MP). With this timing the thorn from the portal closest to the opponent will cover your warp, allowing you to follow with more offensive pressure.
Special Moves
Triglav (DD+P)
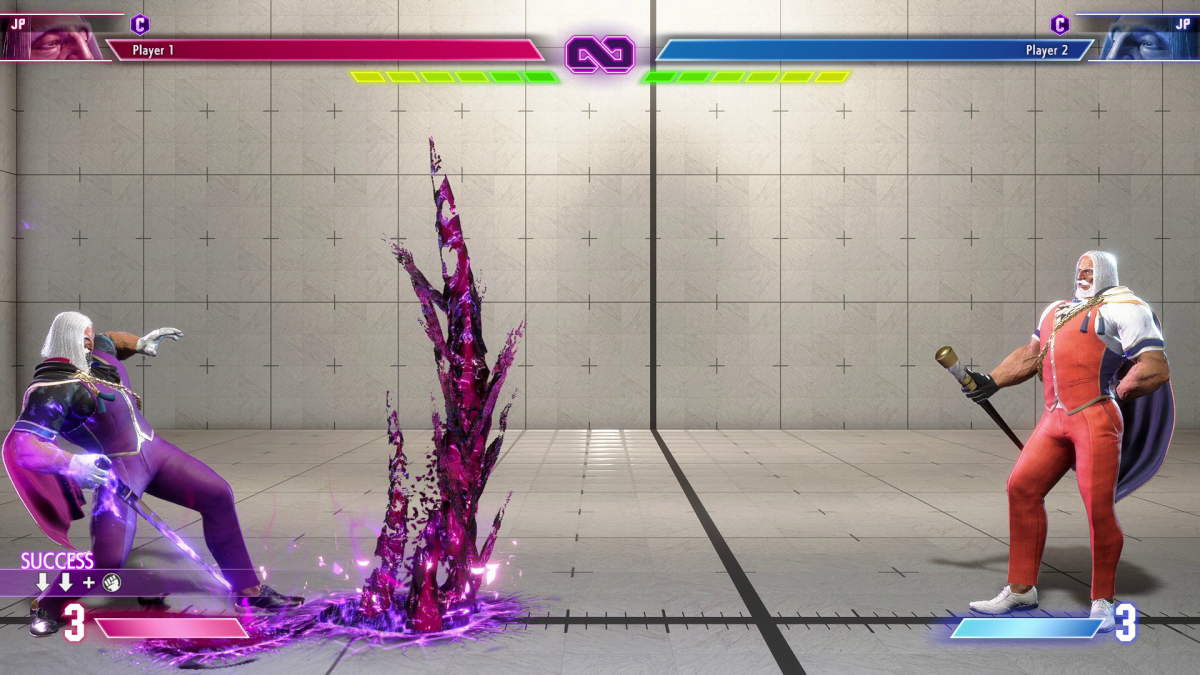
The Triglav Special Move by JP in Street Fighter 6
The Triglav is JP’s thorn attack that comes up from the ground, and can be placed all the way across the screen (HP version), around the middle of the screen (MP version), or close to JP (LP version). If JP is close to an opponent who is in the corner, all three versions will appear in the corner. There are also three different Overdrive versions that cause two thorns to appear instead of one. The LP+MP version appears closest to JP, with the MP+HP version attacking at full screen, and the LP+HP version attacking around the middle of the screen.
While the Triglav can technically punish an opponent’s projectile attack from full screen, it’s not very fast, so the timing is a little strict to do so. It’s best used after an opponent blocks a Torbalan projectile attack at full screen. A well-timed thorn after a blocked projectile will force the opponent to remain at full screen. If they jump or attempt to move, the thorn is likely to connect, resetting the situation.
You can vary this by using a full-screen thorn, then a thorn in the middle of the screen if you anticipate the opponent will try to jump over your next attack. When these sequences are timed correctly, the opponent will be forced to block the attacks or parry them, and if they parry it gives you time to set up Embrace portals.
You can also use Triglav after an anti-air F+HK, then cancel into JP’s level three super for big damage.
Stribog (QCF+P)

The Stribog Special Move by JP in Street Fighter 6
The main purpose of Stribog is to knock the opponent to the far side of the screen. Anytime an opponent is close, you should combo into the Striborg to knock them back across the screen. Your most common combo will likely be two crouching or standing light punches into the light Stribog. It’s not significant damage by any means, but JP’s main goal here is to distance himself from the opponent, not inflict a ton of damage at close range.
The HP version of Stribog leaves JP at an advantage when blocked, but the pushback on it limits any real follow-up options. The LP and MP versions of the attack are technically unsafe in an opponent blocks them, but in most cases the pushback will prevent any guaranteed retaliation.
The OD version of Stribog bounces opponents off the wall, allowing for a juggle follow-up. You can follow with a quick level one super, or you can use a Triglav (DD+P) first, which can then be canceled into a level three super for big damage.
Departure (QCB+P)
- Window Warp After Departure (QCB+LP or QCB+MP)
- Shadow Thorn After Departure (QCB+HP)
The Departure Special Move by JP in Street Fighter 6
Departure places a portal in the air that allows JP to warp to it, or send a thorn protruding through it. If JP is hit, the portals will disappear immediately. In addition, JP cannot use the Embrace projectile throw while a Departure portal is on the screen. In addition, if a portal fully disappears off-screen, it immediately goes away and cannot be used at all, even if the characters move back to where the portal would otherwise be visible again. Once a portal is completely off-screen, it’s gone for good.
Similar to Triglav (DD+P), Departure has three different placements. LP places the portal close to JP, MP places it around the middle of the screen, and HP places it on the far side of the screen. The OD version places two portals. LP+HP puts one portal near JP and the other on the far side of the screen, MP+HP places one portal on the far side of the screen and the other around the middle of the screen, and LP+MP places one portal near JP, and the other near the middle of the screen.
After connecting with a full-screen Triglav (DD+P), you usually have time to create a Departure portal. The OD version executes slightly faster, but in some specific cases JP can still be punished, even when using the OD version, so be careful when and how you use it. Usually only a level three super that travels full screen can punish JP in this situation (such as JP’s own level three super), so just pay close attention to your opponent’s super meter before going for Departure portal setups.
Once a Departure portal is out, QCB+HP will cause a thorn to immediately protrude from the portal. Otherwise, the thorn will automatically protrude after a short time. JP can also warp to the portal using QCB+LP or QCB+MP. When the OD version is used to create two portals, QCB+LP will warp JP to the closest portal, while QCB+MP will warp him to the portal farthest away from him.
At full screen, JP can use the OD Departure to create two portals, immediately throw out a Torbalan (QCF+K) projectile, then quickly warp to the closest portal. This setup will make it difficult for an opponent to hit JP during this process, although it is technically still possible to hit JP in this situation.
Amnesia (DD+K)
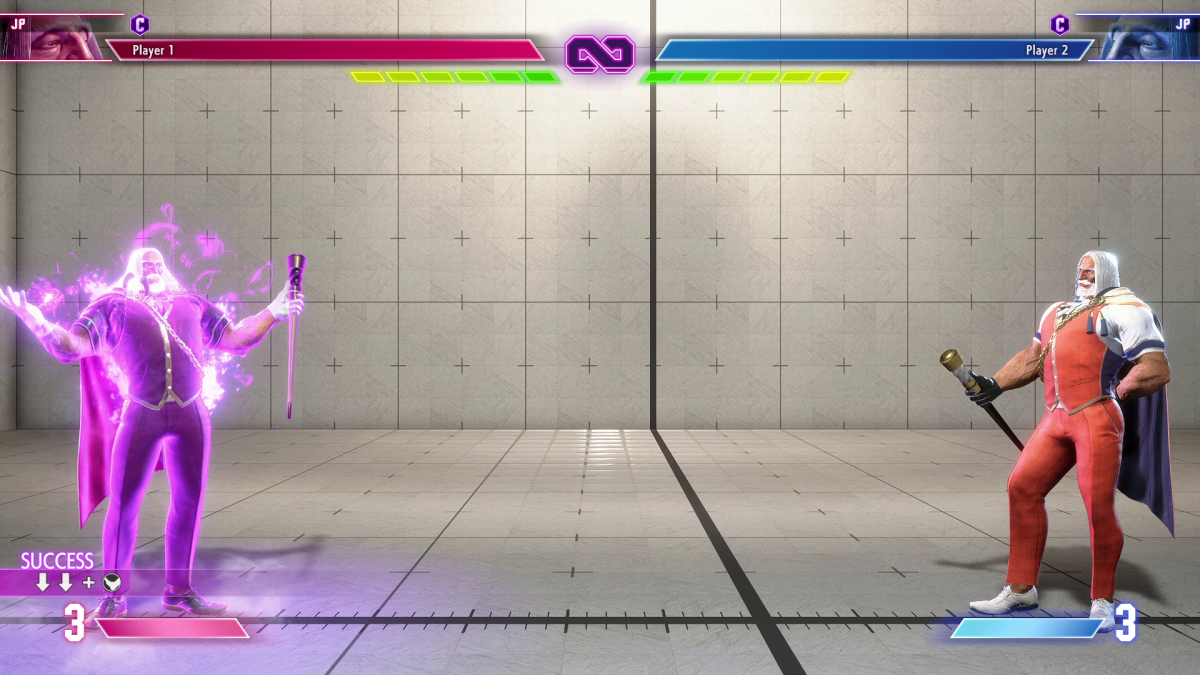
The Amnesia Special Move by JP in Street Fighter 6
The Amnesia counter ability is one of JP’s very few reversal attacks. If timed correctly as an opponent attacks JP, the Amnesia counter will essentially block the attack, placing a timed bomb on the opponent as JP jumps back. After a short time, the bomb explodes automatically.
Using the normal version of Amnesia causes one bomb to follow the opponent, while the OD version adds a second bomb to the mix, and will also counter throw attempts. Neither version will counter projectile attacks. The normal version of Amnesia activates in two frames, meaning it’s not instant, but the OD version has a one-frame activation, so when timed correctly it can be used as a wake-up reversal after getting knocked down.
It’s important to keep in mind the counter only works on physical attacks (and throws for the OD version), not projectiles. In addition, if the opponent throws JP, or uses a Drive Impact shortly after a successful counter, the exploding bomb will have no impact on the opponent and inflict no permanent damage.
The idea behind this counter is to prevent the opponent from attacking until the bomb explodes. It can be used in a wake-up scenario as a reversal, as an anti-air counter when an opponent jumps toward JP, or if you make a hard read as to when an opponent will attack. Be careful when using it as an anti-air tool, because an opponent may empty jump (jump toward you without attacking) and then attack JP as soon as they land.
While there are a variety of ways to use the bombs, try to stay out of the opponent’s throw range so you can avoid being thrown. Jumping toward an opponent, or using the short window before the bomb explodes to go for a Departure portal setup can work well in many instances once you’ve trained the opponent not to attack after you land a successful counter. You can also pressure with various attacks.
Torbalan (QCF+K)

The Torbalan Special Move by JP in Street Fighter 6
One of JP’s main projectile attacks is the Torbalan. There are four different versions of the attack. LK is the fastest version, and can be blocked by a standing or crouching opponent. Use this to end a combo. MK is the overhead version of the attack, and HK is the low-hitting version of the projectile. However, you cannot combo into the MK or HK versions unless it’s to juggle an aerial opponent after a Triglav thorn, or similar situation.
It’s possible to mix up an opponent by ending a combo string with the MK or HK versions. While it will not combo naturally, and you can be interrupted by some attacks, if you see that the opponent is standing, using a low version may catch them off guard. Likewise, if you see the opponent is crouching, you may be able to sneak in the overhead version. This is especially effective during a block string such as HK, HP, QCF+HK, or even LP, LP, QCF+HK. Keep in mind an opponent can parry or Drive Impact through the projectile in these situations, so try not to be predictable with it.
The Torbalan has a fair amount of recovery time, meaning you can be punished severely if an opponent jumps over the attack. However, you can fake the projectile by holding down the attack button. This fake recovers significantly faster, and allows JP to block almost immediately, although a well-timed jump can still give an opponent ample time to punish JP.
Embrace (QCB+K)
The Embrace Special Move by JP in Street Fighter 6
Embrace is very similar to Torbalan (QCF+K), except that instead of a normal projectile attack, this is a projectile throw. To balance the fact that the attack cannot be blocked, it executes slower than Torbalan, has a slightly different animation, and a different sound effect. Combine all of this and it will be very difficult to hit a skilled opponent with this attack in most situations.
While novice players may get caught off guard, most skilled players will be able to react to the projectile throw as soon as they see it. Because it has a lengthy recovery period, if an opponent jumps over the attack, they have what seems like forever to determine how they want to punish JP. In fact, the attack executes and recovers so slowly that skilled opponents will be able to react and jump over the attack even when using Embrace to end a block string.
It’s also important to note that you cannot use Embrace while a Departure (QCB+P) portal is on the screen. That also means it cannot be used during the Lovushka (QCBx2+P) level two super either. These limitations drastically limit how useful the attack can be.
Command Normals
Guillotinna (F+MK) – JP’s overhead. It’s not safe when an opponent blocks it, but you can combo after it when used following a Drive Rush.
Malice (DF+HP) – This is a relatively long-range low attack that can catch opponents off guard. It’s not safe if the opponent blocks it, but when used max range it can limit how well an opponent can punish JP.
Bylina (F+HK) – This is a mid-range anti-air attack that can be canceled into the Triglav (DD+P) thorn to juggle an opponent.
Grom Strelka (B+MP,MP) – While limited in range, you can use this target combo to hit-confirm into a special or super.
Zilant (HK,HP) > Mid (HP) or Low (HK) – The first two hits of this target combo are great to hit confirm into a special or super. Even if the opponent blocks, you can mix-up between the overhead and low Torbalan (QCF+K) variations. Once again, the opponent can block or interrupt this mix-up, but it can work well to catch some opponents off guard. While the third attack in this target combo is a built-in mix-up between an overhead and a low, it can be parried, or an opponent can use Drive Impact to blow through the mix-up.
Super Moves
Chornobog (QCFx2+P)
- Requires one bar of super meter
JP’s level one super works best to end combos, and as an invincible reversal. This is JP’s only invincible reversal, so it’s good to keep at least one meter available in case you need to make a hard read while dealing with wake-up pressure. For juggles, you can use Chornobog after an OD Stribog (QCF+PP) or after a Triglav (DD+P) in some situations.
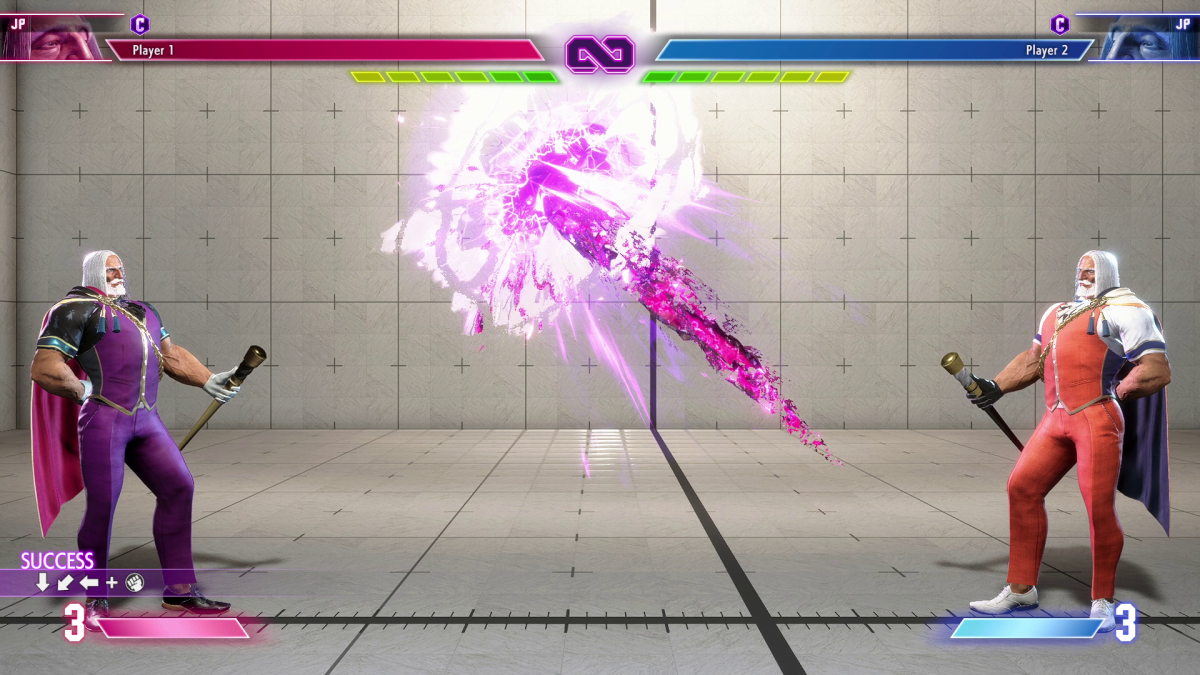
Lovushka (QCBx2+P)
- Requires two bars of super meter
JP’s level two super can be useful when it hits or when it’s blocked. The opponent is surrounded by portals, as projectiles attack the opponent up to four times. While the entire super can be parried with relative ease, the attacks do come from behind, as an overhead, and as a low, in fairly rapid succession. You can also go into some elaborate combos if the super connects.
When the super is blocked you have to be somewhat careful with how you set it up. It appears where the opponent was standing when the super was initiated. It’s relatively easy to jump forward and escape most of the attacks, or they can simply parry. However, JP can combo into it after his HK>HP target combo, and other similar attacks.
While the super is active, JP cannot use the Embrace (QCB+P) projectile throw, but if an opponent is stuck in a parry animation, you can use that to your advantage by setting up Departure portals for an additional mixup as the super comes to an end.
Interdiction (QCFx2+K)
- Requires three bars of super meter
JP’s level three super covers the entire length of the screen in a split second. You can combo into it after a full-screen Triglav (DD+HP) for big damage after most of JP’s bread and butter combos. JP can also punish projectiles from full screen, and drastically limit his opponent’s options once he has three bars of super meter ready to go.